How to protect Zoom Web SDK's with DRM-X 4.0 (Prevent Screen Recording for Zoom meeting)
1. Download the Zoom Web Client SDK:
Download URL: https://github.com/zoom/sample-app-web(Please download and install NodeJS first)
Or execute the following command to download, install and run the zoom web client SDK:
git clone https://github.com/zoom/sample-app-web.git --
branch master --depth 1
cd sample-app-web/CDN
npm install
npm run https
Tip: You must use “npm run https” command to start the service on the server, otherwise you will not be able to call the microphone and camera. In the local test environment, you can use the “npm run start” command to start the service.
2. Configure Web Client SDK:
First, you need to purchase a Zoom Pro version account, then log in to your Zoom account and visit: https://marketplace.zoom.us/user/build

In this interface you will get two parameters: API Key and API Secret.
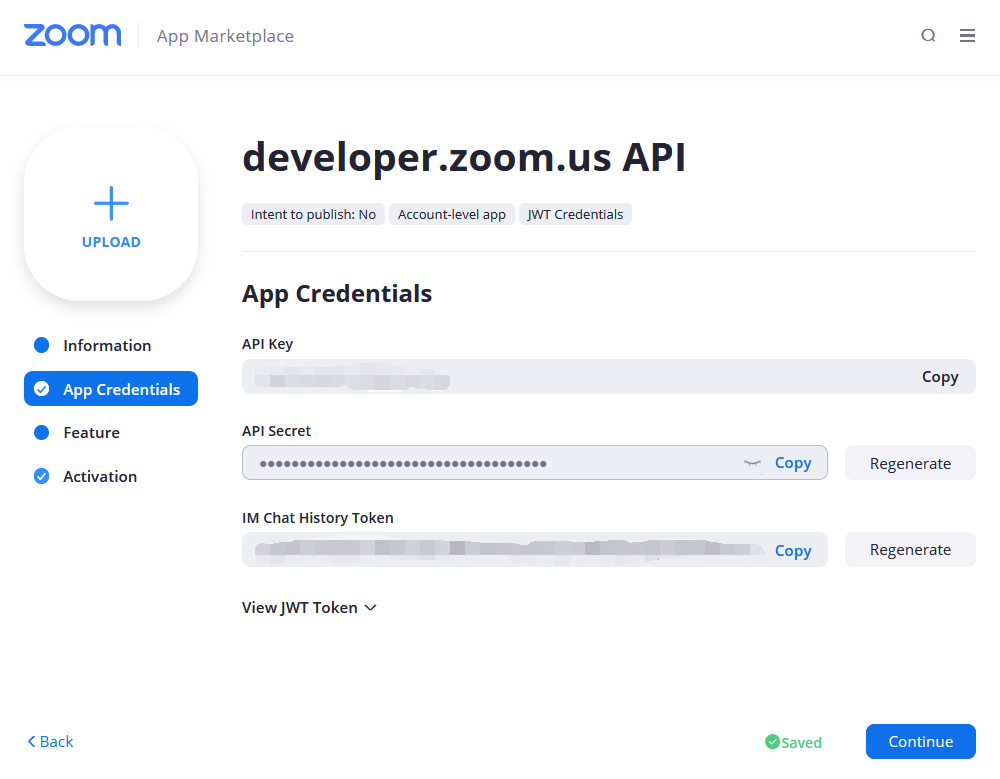
Then open the downloaded Zoom Web Client SDK code folder, edit the sample-app-web\CDN\js\index.js file, and then fill in the API Key and API Secret obtained by the Zoom account into API_KEY and API_SECRET, respectively. As shown below:
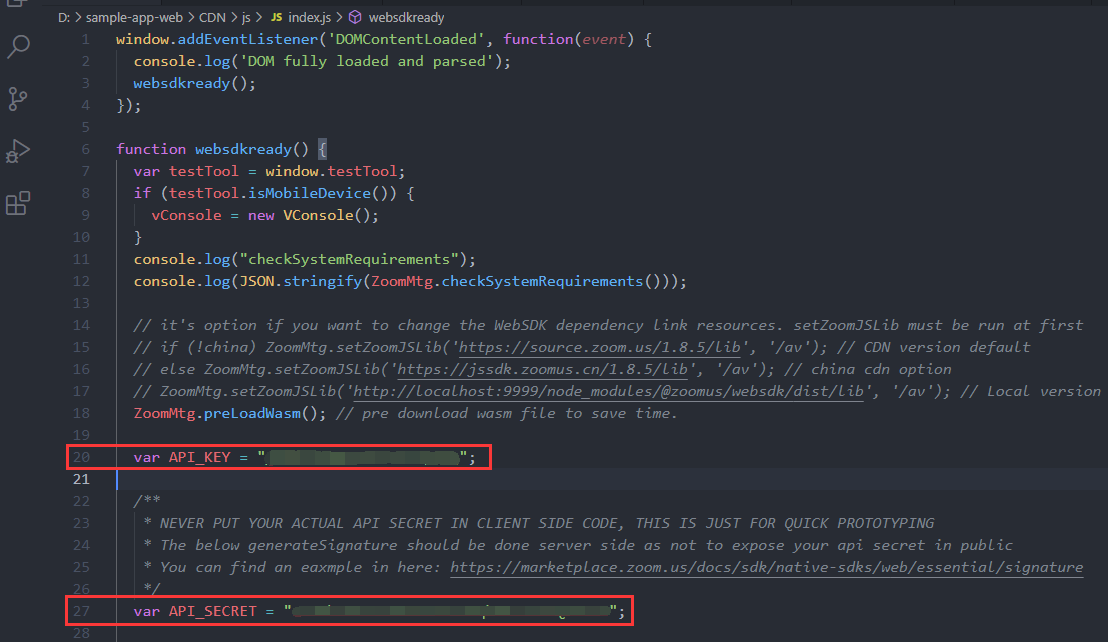
Continue to edit the sample-app-web\CDN\meeting.htmlpage:

Add the code in the red box to hide the information about the meeting on the meeting interface.
After setting, the service will automatically restart, and then open the browser to visit: http://localhost:9999
For deploying the Zoom Web Client SDK, you can also refer to: https://marketplace.zoom.us/docs/sdk/native-sdks/web
3. Register and log in to DRM-X 4.0 account:
Visit https://www.drm-x.com/Fees-Compare-4.0.aspx to register for a 90-day free trial account.
After successful registration, visit https://4.drm-x.com to login to the DRM-X 4.0 account.
4. Encrypt the Zoom Web SDK page:
After logging in to the DRM-X 4.0 account, click "Protect File" in the left menu, and complete the configuration before encryption step by step as required. In the Step 4. Protect Files Online, download the Xvast Packager (zip file), after the download is complete, unzip the downloaded zip file, and copy the two files inside to the Xvast installation directory.
Then go back to the " Protect File" page and click the "Popup encrypt dialog" button.

You will see the interface for encrypting files.
Step 1: Select "add new output folder" in the drop-down box of the output file, and select the folder of the encrypted web page.
Step 2: Cancel "add _P to encrypted files".
As shown in the figure below:
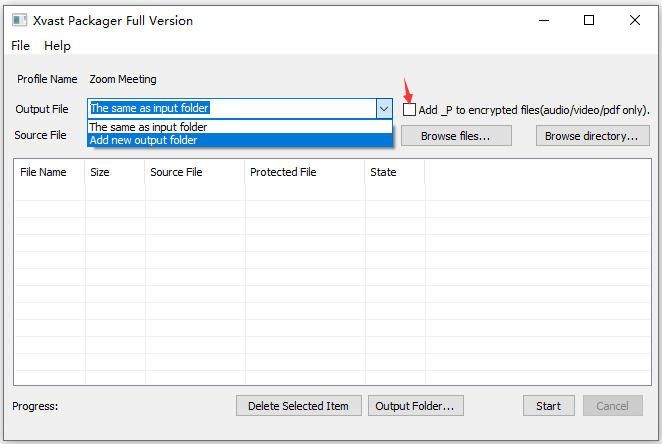
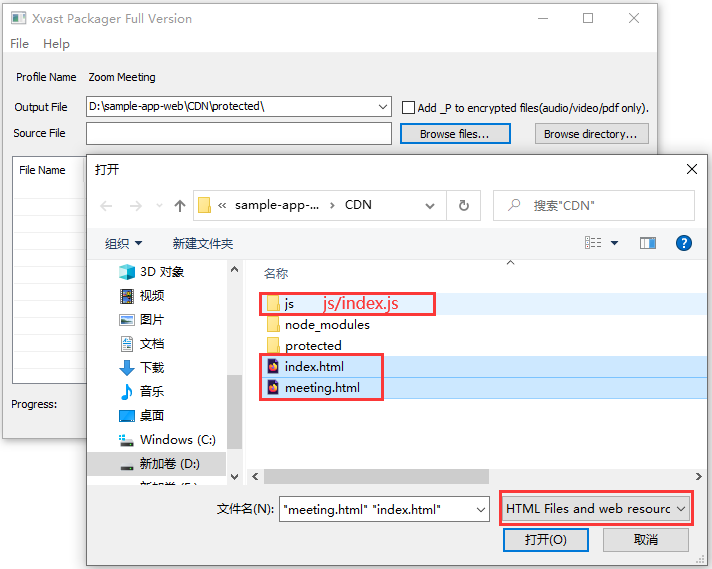
Step 3: Click "Browse files..." Button, and select "HTML files and web resources" in the lower right corner of the select file interface.
Step 4: We need to encrypt some pages of the web client SDK, which contains index.html , meeting.html And CDN/JS folder index.js.
Refer to the figure below:
Step 5: Click the "start" button in the encryption interface to encrypt the above three files.
After encryption, we need to replace the encrypted file (please make sure to backup the source file before replacement!) , replace first index.html and meeting.html. Then replace the index.js.
5. To access the encrypted zoom web client SDK page:
Finally, we use the Xvast browser to access the http://localhost:9999, enter the username and password to obtain the license in the login window. (default username: testuser, password: 123456).
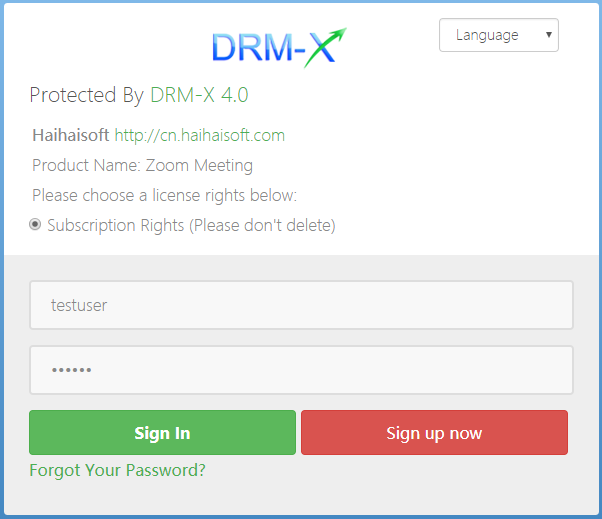
After you log in and obtain the license, you will visit the join Zoom conference page.
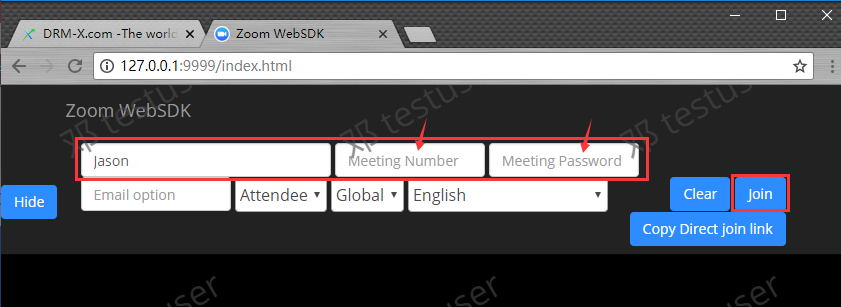
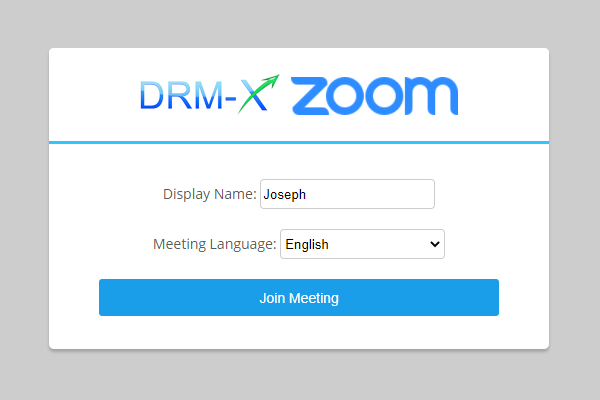
Of course, you can also modify the style of the index.html source file. Please re-encrypt and replace the file after modification.
The following picture is the modified join meeting page effect, or you can cancel the join meeting page, you can integrate it with your website, automatically obtain the user's username and join the meeting, please refer to: How to use Zoom Web Client SDK Integrate with your website?
After entering the meeting number and meeting password, click the Join button to join the meeting.
The effects of the meeting are as follows:
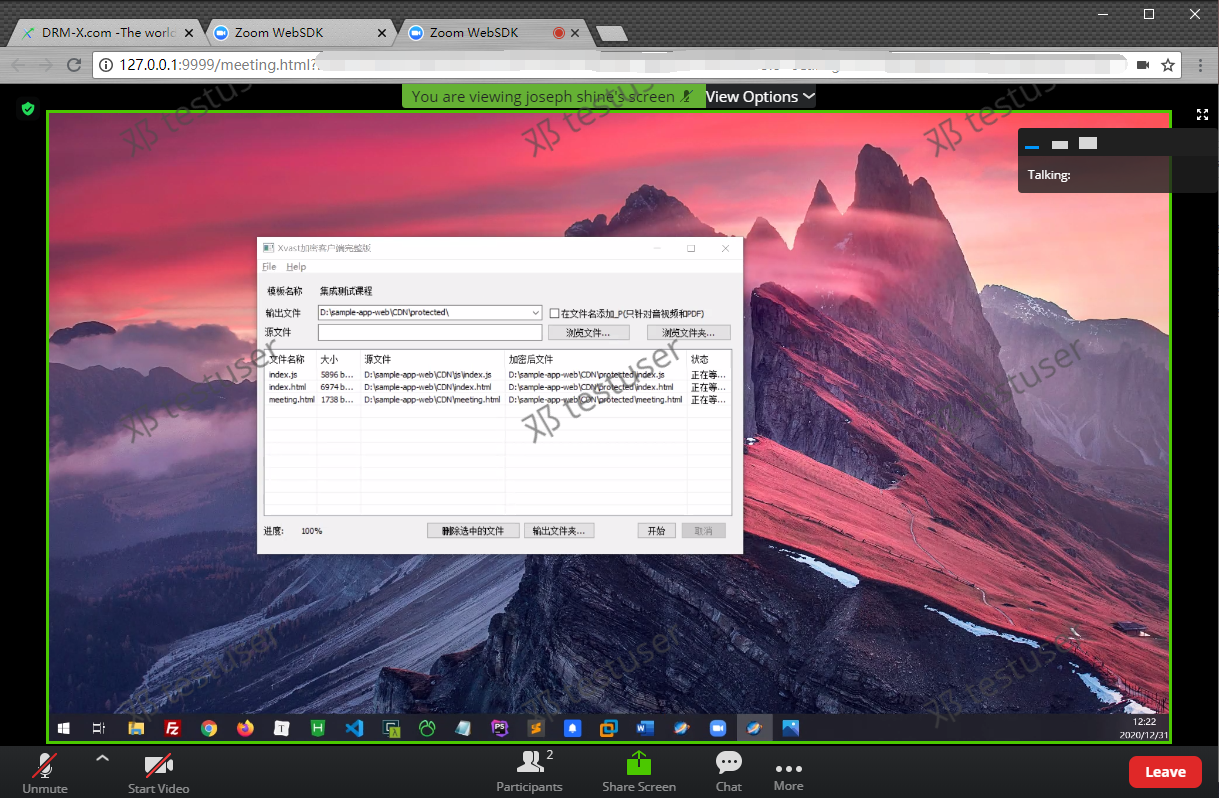
It is recommended that the conference presenter use the Zoom desktop client to start the conference.
After you test that everything is working properly, please upload the Zoom Web Client SDK code to your server for deployment. You can also make Zoom Meeting on your website through deep modification.
Encryption security instructions: DRM-X 4.0 only encrypts the Zoom Web SDK web pages, so users must use Xvast to access Zoom meetings, so it supports DRM-X 4.0 Prevent Screen Recording, Watermark and other functions. However, DRM-X 4.0 does not encrypt the video data transmitted by the video conference, and the security of the video conference is the responsibility of Zoom.

