We have demonstrated "How to protect Zoom Web SDK's with DRM-X 4.0 (prevent screen recording for zoom meeting)” before. Here we will demonstrate "How to use Zoom Web Client SDK Integrate with your website?"
The effect of the modified Zoom SDK to join the meeting is as follows: users log in to your website, access the specified PHP page to obtain user information, and then automatically join the meeting (when the meeting host starts the meeting). Because some pages of zoom SDK are encrypted by DRM-X 4.0, users will first connect to DRM-X 4.0 server to obtain license before joining the conference.
The interface and verification rules for the user to obtain the license can also be integrated with your website through the DRM-X 4.0 integrated interface. The user is verified when the user obtains the license, and it is determined whether the user has the right to join the meeting. Please refer to the integration tutorial for obtaining license: DRM-X 4.0 Integration Tutorial
How to use Zoom Web Client SDK Integrate with your website?
1. Download the zoom web SDK sample code
Download URL: https://www.drm-x.com/download/DRM-X_4.0_Integration/zoom_sdk_integration.zip
2. Put the downloaded code on your website
Our integrated demo website is based on WordPress framework. You can also integrate with your own website. You only need to make some modifications.
Put the downloaded and unzipped DRM integration folder in the root directory of your website (WordPress only).
3. Modify zoom configuration parameters
First open the package.json file under the Zoom_SDK folder and modify the part marked in the red box.

Here is to set up your Zoom Web SDK to access via https protocol, you need to have your own https certificate. Please search for how to support https protocol and certificate application.
After configuring the domain name to support https protocol, use the “npm run https“ command to start the Zoom Web SDK service:

Tip: You must use “npm run https” command to start the service on the server, otherwise you will not be able to call the microphone and camera. In the local test environment, you can use the “npm run start” command to start the service.
Let’s start to modify the code. First, open the wp-meeting.php file. The function of this page is relatively simple. First, the user’s login information is obtained. Based on the obtained information, it is judged whether the user is logged in to the website. If logged in to the website, it will visit the meeting page, if you are not logged in, you will access the website login page.

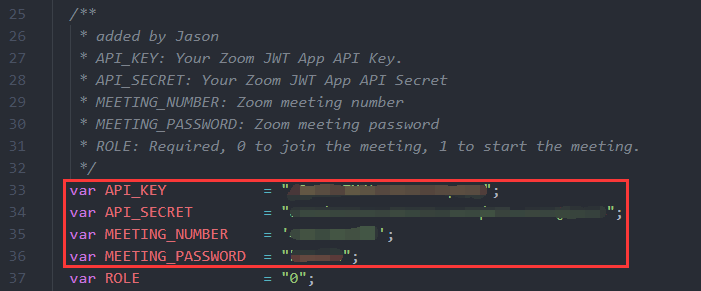
Then open the Zoom_SDK/js/wp-meeting.js file and modify the API_KEY, API_SECRET, MEETING_NUMBER, MEETING_PASSWORD.

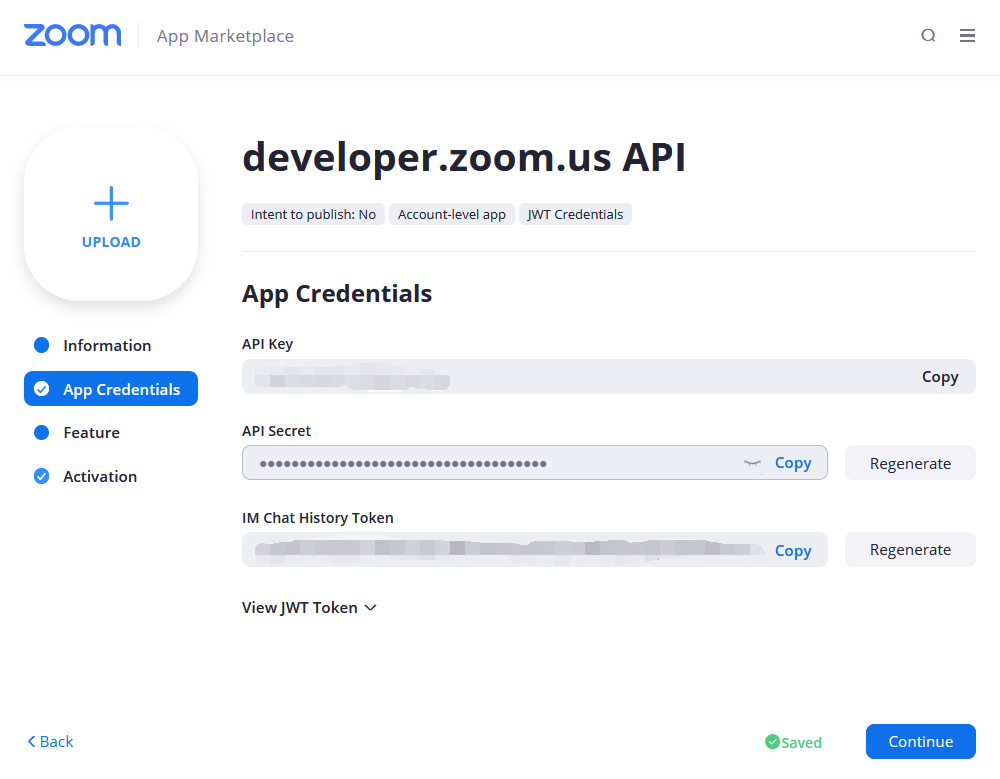
Please login to your Zoom account to view the values of API_KEY and API_SECRET:

Meeting number and meeting password: You can schedule a private meeting in the Zoom desktop client. The meeting number and password of a private meeting can be used repeatedly. Special reminder: Please ensure that the meeting number and meeting password are not leaked!
And then modify the LeaveUrl: Required, the URL the user is taken to once the meeting is over.

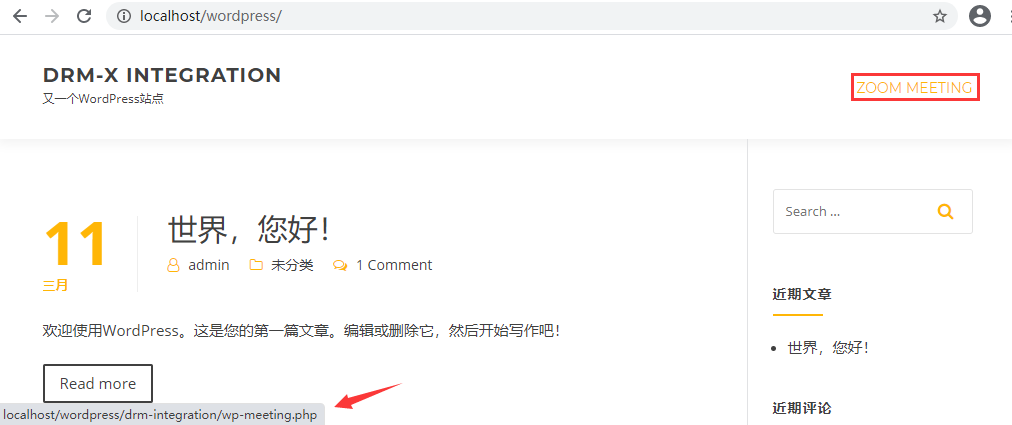
The parameters have been modified, but you need to do one last thing, add the conference entrance.
As shown in the figure below, I added a custom menu in the head menu of the website, and the URL is set as follows: http://localhost/wordpress/drm-integration/wp-meeting.php

Of course, you can also put the conference portal on the user's account information page or other places you want to add.
If you have more than one meeting to protect, please copy wp-meeting.php, Zoom_SDK/wp-meeting.html, Zoom_SDK/js/wp-meeting.js These three files form a new zoom web conference, and modify the URL and conference information (conference number and conference password) to be modified.
4. Encrypt Zoom web SDK file
Finally, please use DRM-X 4.0 to protect Zoom_SDK/wp-meeting.html and Zoom_SDK/js/wp-meeting.js.
When encrypting zoom conference files, please create the corresponding "License Profile" in DRM-X 4.0 and use the License Profile to encrypt conference resources.
Note: If you have a new meeting schedule to protect, please create a new license profile and encrypt the meeting resource file accordingly.
When encrypting a file, please make a backup. Because the encrypted file cannot be edited, when you need to modify it again, you need to modify the original file and re encrypt it before uploading.

