Nous avons déjà démontré comment protéger le SDK Web Zoom avec DRM-X 4.0 (empêcher l'enregistrement d'écran pour les réunions Zoom) . Nous allons maintenant démontrer comment utiliser le SDK Web Client Zoom pour l'intégrer à votre site Web.
L'effet de la modification du SDK Zoom pour rejoindre la réunion est le suivant : les utilisateurs se connectent à votre site web, accèdent à la page PHP spécifiée pour obtenir leurs informations, puis rejoignent automatiquement la réunion (lorsque l'organisateur la lance). Certaines pages du SDK Zoom étant chiffrées par DRM-X 4.0, les utilisateurs se connecteront d'abord au serveur DRM-X 4.0 pour obtenir une licence avant de rejoindre la conférence.
L'interface et les règles de vérification permettant à l'utilisateur d'obtenir la licence peuvent également être intégrées à votre site web grâce à l'interface intégrée DRM-X 4.0. L'utilisateur est vérifié lors de l'obtention de la licence et son droit à participer à la réunion est déterminé. Veuillez consulter le tutoriel d'intégration pour l'obtention de la licence : Tutoriel d'intégration DRM-X 4.0.
Comment utiliser Zoom Web Client SDK Intégrer à votre site Web ?
1. Téléchargez l'exemple de code du SDK Web Zoom
URL de téléchargement : https://www.drm-x.com/download/DRM-X_4.0_Integration/zoom_sdk_integration.zip
2. Placez le code téléchargé sur votre site Web
Notre site web de démonstration intégré est basé sur le framework WordPress. Vous pouvez également l'intégrer à votre propre site web. Il vous suffit d'effectuer quelques modifications.
Placez le dossier d'intégration DRM téléchargé et décompressé dans le répertoire racine de votre site Web (WordPress uniquement).
3. Modifier les paramètres de configuration du zoom
Ouvrez d’abord le fichier package.json sous le dossier Zoom_SDK et modifiez la partie marquée dans la case rouge.

Voici comment configurer votre SDK Web Zoom pour accéder au protocole https. Vous devez disposer de votre propre certificat https. Veuillez rechercher comment prendre en charge le protocole https et l'application de certificat.
Après avoir configuré le nom de domaine pour prendre en charge le protocole https, utilisez la commande « npm run https » pour démarrer le service Zoom Web SDK :
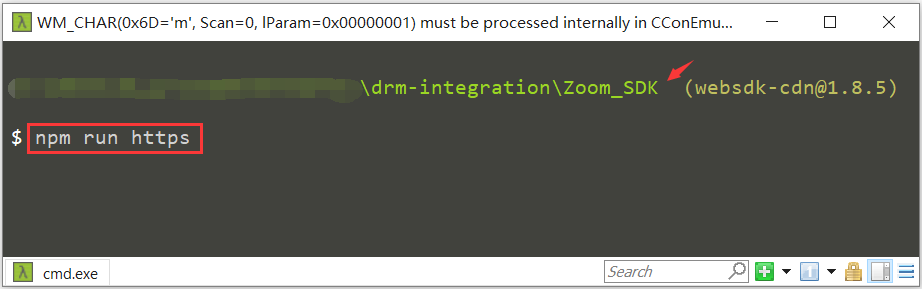
Conseil : Vous devez utiliser la commande « npm run https » pour démarrer le service sur le serveur, sinon vous ne pourrez pas appeler le microphone et la caméra. Dans l'environnement de test local, vous pouvez utiliser la commande « npm run start » pour démarrer le service.
Commençons par modifier le code. Ouvrez d'abord le fichier wp-meeting.php . Le fonctionnement de cette page est relativement simple. Les informations de connexion de l'utilisateur sont d'abord obtenues. Grâce à ces informations, il est possible de déterminer si l'utilisateur est connecté au site web. S'il est connecté, il accède à la page de réunion ; s'il n'est pas connecté, il accède à la page de connexion.

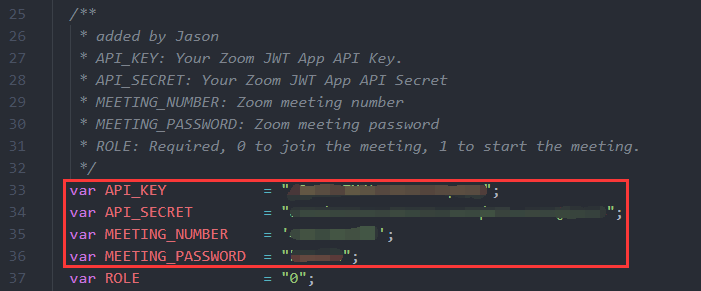
Ouvrez ensuite le fichier Zoom_SDK/js/wp-meeting.js et modifiez API_KEY, API_SECRET, MEETING_NUMBER, MEETING_PASSWORD.
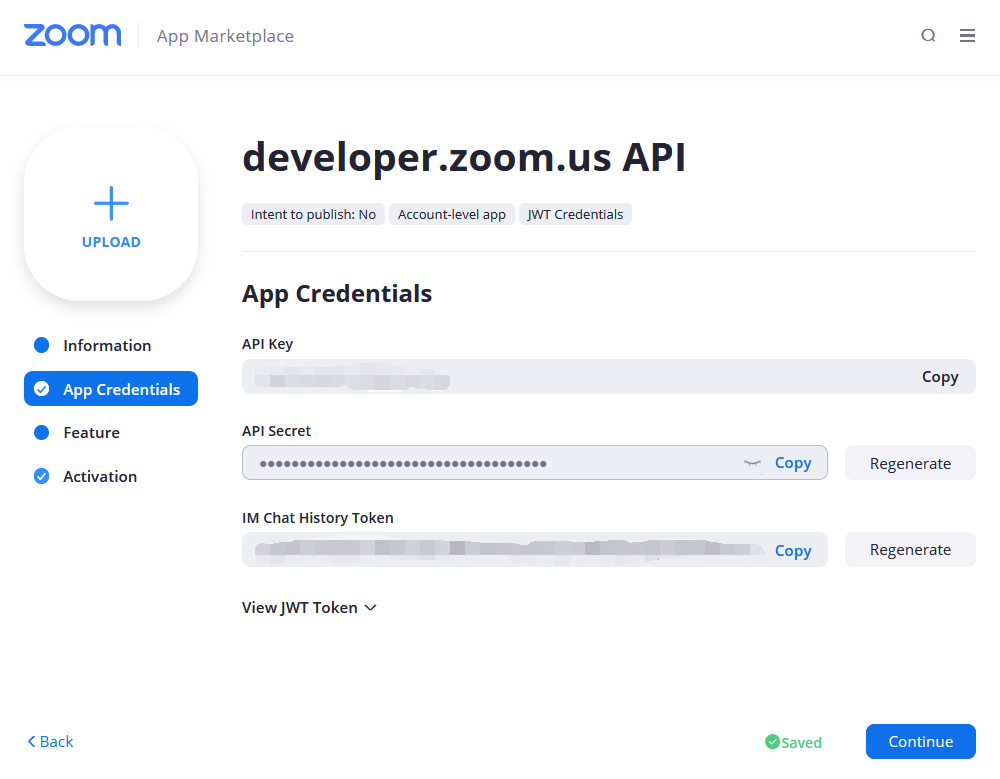
Veuillez vous connecter à votre compte Zoom pour afficher les valeurs de API_KEY et API_SECRET :
Numéro et mot de passe de la réunion : Vous pouvez planifier une réunion privée dans le client Zoom. Le numéro et le mot de passe d'une réunion privée peuvent être utilisés plusieurs fois. Attention : Veillez à ce que le numéro et le mot de passe ne soient pas divulgués !
Et puis modifiez LeaveUrl : Obligatoire, l'URL vers laquelle l'utilisateur est redirigé une fois la réunion terminée.

Les paramètres ont été modifiés, mais il vous reste une dernière chose à faire, ajouter l'entrée de la conférence.
Comme le montre la figure ci-dessous, j'ai ajouté un menu personnalisé dans le menu principal du site Web, et l'URL est définie comme suit : http://localhost/wordpress/drm-integration/wp-meeting.php
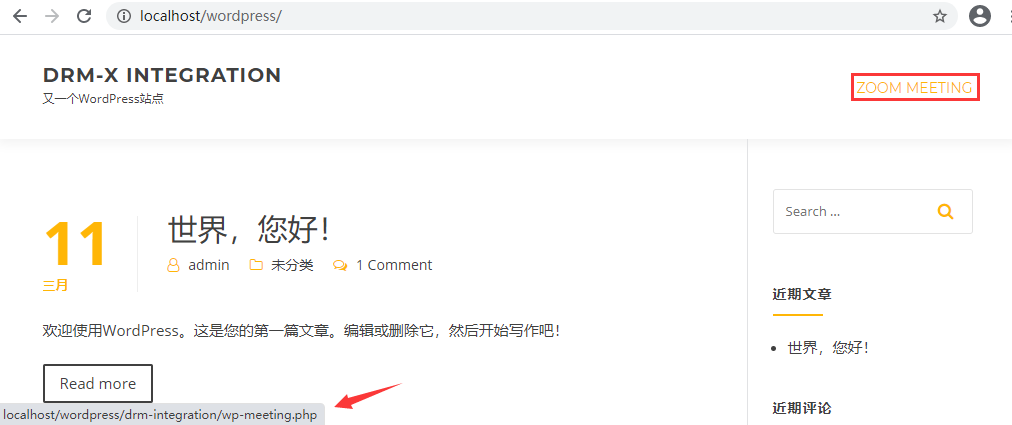
Bien entendu, vous pouvez également placer le portail de conférence sur la page d'informations du compte utilisateur ou à d'autres endroits que vous souhaitez ajouter.
Si vous avez plusieurs réunions à protéger, veuillez copier wp-meeting.php , Zoom_SDK/wp-meeting.html , Zoom_SDK/js/wp-meeting.js Ces trois fichiers forment une nouvelle conférence Web Zoom et modifient l'URL et les informations de la conférence (numéro de conférence et mot de passe de la conférence) à modifier.
4. Chiffrer le fichier SDK Web Zoom
Enfin, veuillez utiliser DRM-X 4.0 pour protéger Zoom_SDK/wp-meeting.html et Zoom_SDK/js/wp-meeting.js .
Lors du cryptage des fichiers de conférence Zoom, veuillez créer le « profil de licence » correspondant dans DRM-X 4.0 et utiliser le profil de licence pour crypter les ressources de la conférence.
Remarque : si vous avez un nouveau calendrier de réunion à protéger, veuillez créer un nouveau profil de licence et crypter le fichier de ressources de réunion en conséquence.
Lors du chiffrement d'un fichier, veuillez effectuer une sauvegarde. Le fichier chiffré étant non modifiable, si vous souhaitez le modifier à nouveau, vous devrez modifier le fichier d'origine et le rechiffrer avant de le télécharger.
